Click here for the code to add points
Imagine that there was a way for you to know exactly what your subscribers want and how bad they want it. Let’s say that your blog covers multiple topics within your niche.
And let’s say that some of your subscribers were EXTREMELY interested in one or more of those topics. Would you want to know? And no, I’m not just talking about knowing that they are interested in it because they clicked a link that says they are interested in it and got a tag as being interested.
I’m talking about being able to give them a rating that shows exactly how bad they want it. Well, imagine no more, because that’s exactly what you can do by setting up custom lead scoring.
Now this is a bit high-level and slightly more technical than some of the other stuff we’ve covered in this series, but I promise I’ll break it down so that you can understand it and take action on it.
First thing first – let’s see how it looks when it’s set up and done well. I’m gonna show you a drip account where we’ve set up custom fields for every subscriber based on specific topics.
Case Study: Custom Lead Scoring Done Well
On the blog that’s associated with this Drip account, there are all kinds of topics related to social media marketing. We will have custom fields for Facebook, Twitter, Instagram and all the other social networks.
Whenever a subscriber visits a post on the blog that has Facebook in the title, their Facebook lead score custom field will increase by one point.
Whenever they visit a post that deals with Twitter, their Twitter lead score custom field will increase by one point and so on and so forth.
If they visited 10 articles about Facebook and one about Instagram, their Facebook lead score will be 10 and their Instagram lead score will be 1.
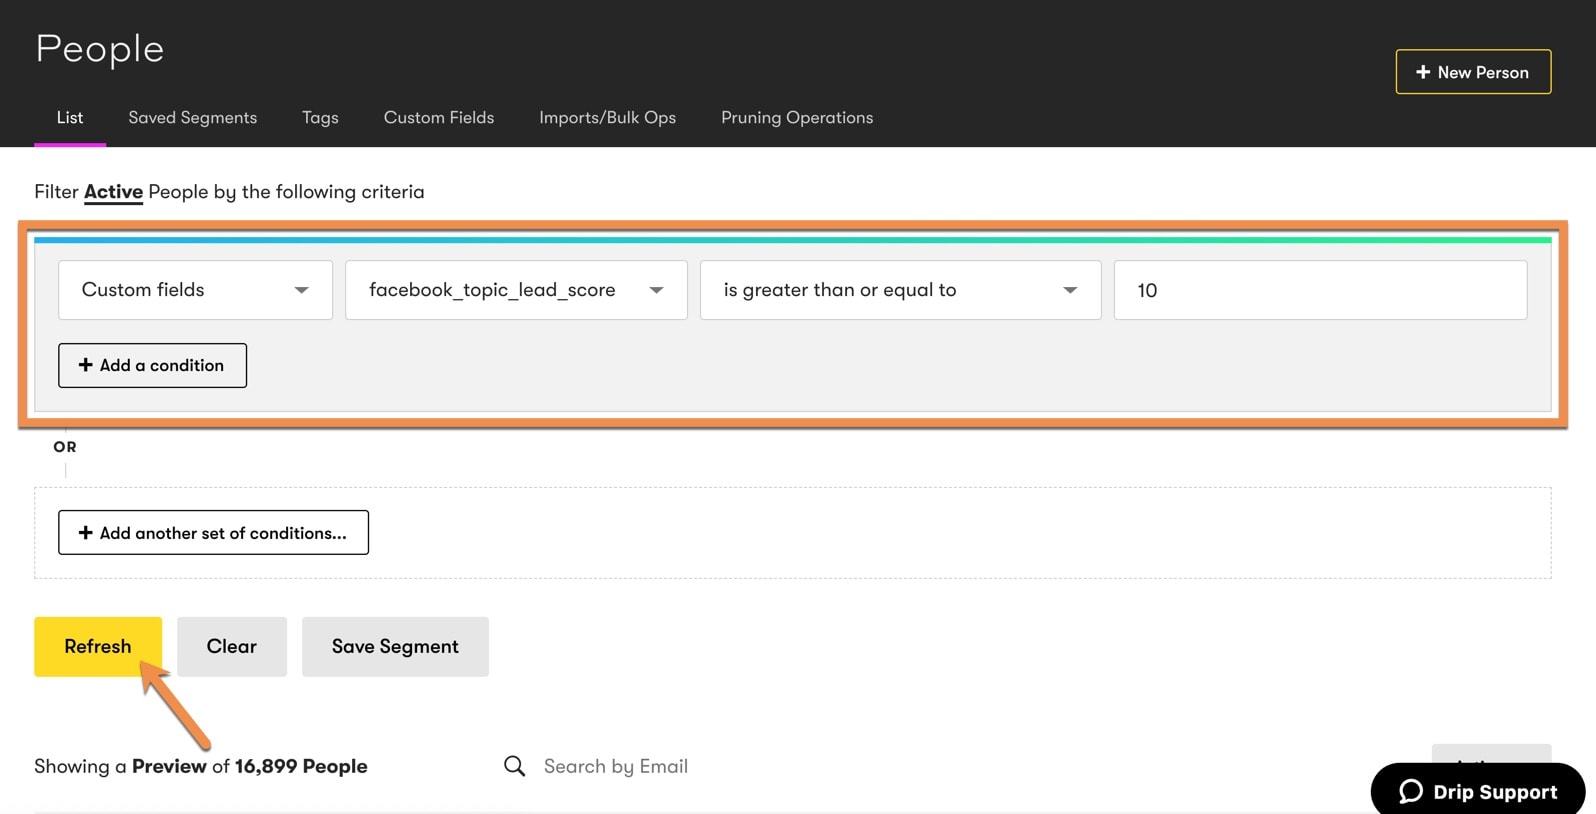
When in the “People” section of this Drip account, I will choose the Custom field “Facebook topic lead score”.
I’ll set this as is greater than or equal to 10 and then I’ll hit Refresh.

What I’m basically asking Drip to do here is show me all the subscribers who have visited at least 10 articles on the blog that have the word Facebook in the title.
And now you can see that there are over XXXX subscribers who meet that criteria.
The beauty of this is that I don’t have to wait for them to give me this data. It’s data that collects automatically based on what they are doing – which is simply visiting the blog.
Let’s look at how to set this up.
How to Setup Custom Lead Scoring
Step 1: Make sure you have Drip tracking set up on your website.
If you use WordPress, check out my video on how to set up Drip Tracking.
If you aren’t using WordPress, the Drip Knowledgebase has great step by step instructions on how to set it up.
Step 2: Set up the Custom fields for tracking the lead scores.
Now, as I’ve emphasized throughout this series, it’s important to be consistent with your naming structure.
And I highly recommend going from general to specific. And one other thing to note with custom fields is that you aren’t allowed to use any spaces, but you can use underscores.
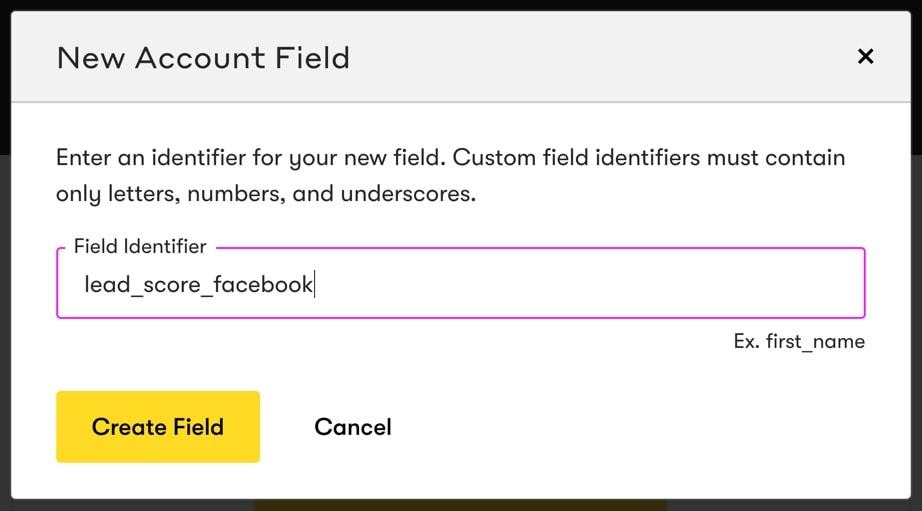
An example of good naming structure would be “lead_score_facebook”. That goes from general “lead score” to specific “Facebook”.
When you finish naming your custom field, click on the “Create Field” button there and you’re good to go.
Step 3: Create a point-adding rule
This rule adds 1 point every single time a subscriber visits a page on the blog with the name “Facebook” in the title.
To do that, go to Automation and then click on Rules.
And then click on the “New Basic Rule” button.
Give this rule a name. Once again, I recommend going from general to specific. In this case, I’ll call it Lead Score | Facebook
Then let’s set up the details of the rule. For the event, I’ll choose Visited a page.
Now, this isn’t one specific page that I want to trigger the action. It’s ANY page with the word Facebook.
The way to indicate that is by putting the word Facebook in brackets [facebook]
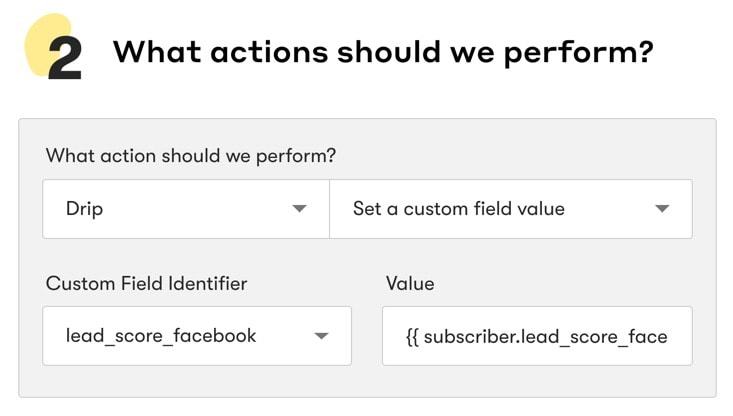
Then, set an action. And the action I’m looking for is set a custom field value.
Now, the custom field you want to update is lead_score_facebook.
Here’s what you need to type: {{ subscriber.lead_score_facebook | plus: 1 }}. Of course, you’d substitute whatever custom field you used.
Now, once you’ve saved the rule and activated it you are good to go.
Whenever someone visits ANY page on your blog that has Facebook in the title, meaning in the URL, Their Facebook Lead score will increase by one point.
QUESTION: How could you use custom lead scoring in your business? Go ahead and leave your answer to this question in the comments area below.


