In Drip, and just about any other email marketing or marketing automation software, you have the ability to create opt-in forms.
These are forms that your website or blog visitors can use to join your email list, and I’m gonna show you how to create them.
Disclaimer: I don’t use the built in Drip forms. I’ve used a number of email marketing services and have always stayed away from using their built-in forms.
While using these forms are pretty simple and easy to do, I find that they aren’t as powerful as some other options.
I actually use Thrive Leads and other tools for getting people onto my Drip list because I like the additional features I get with those tools.
And the reason why I use these plugins and other systems is because they are more powerful and give me the ability to do much more beyond just create forms.
Creating Forms in Drip
There are two ways to create forms. You can either create them in your campaign settings or by going to Forms in the top menu..
Now the process for creating forms is pretty much identical in both cases, so I’m gonna show you how to do it one way and then you’ll know how to do it in both ways.
Go to forms, and if you have forms already created, it will show you those forms.
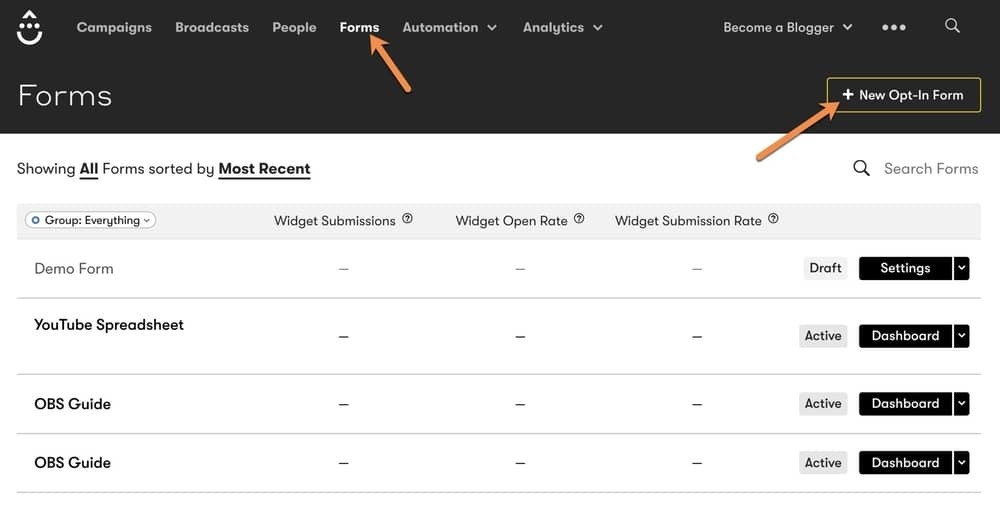
Click on “New Opt in Form”
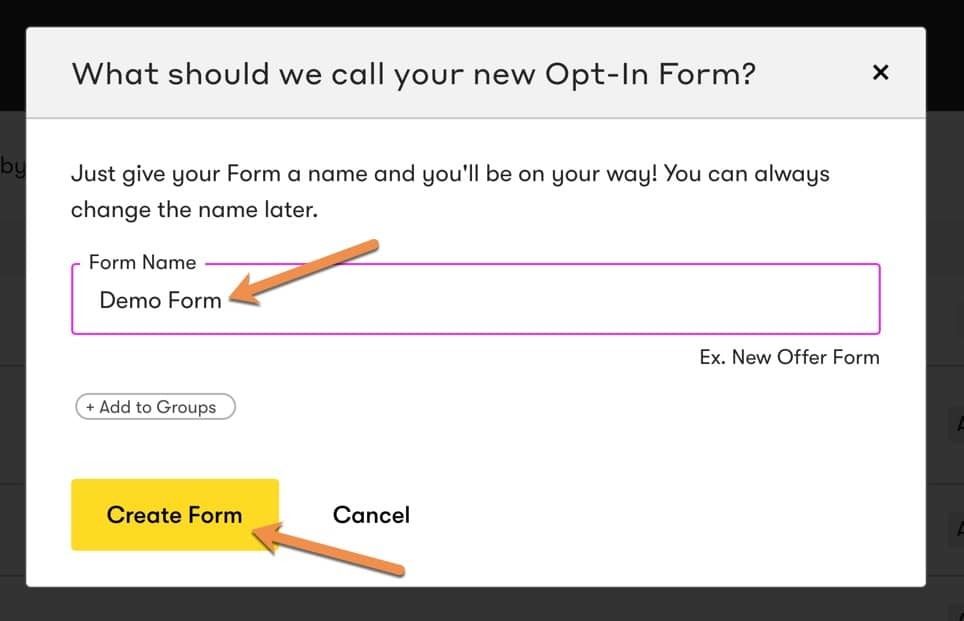
Give the form a name and click on “Create Form”.
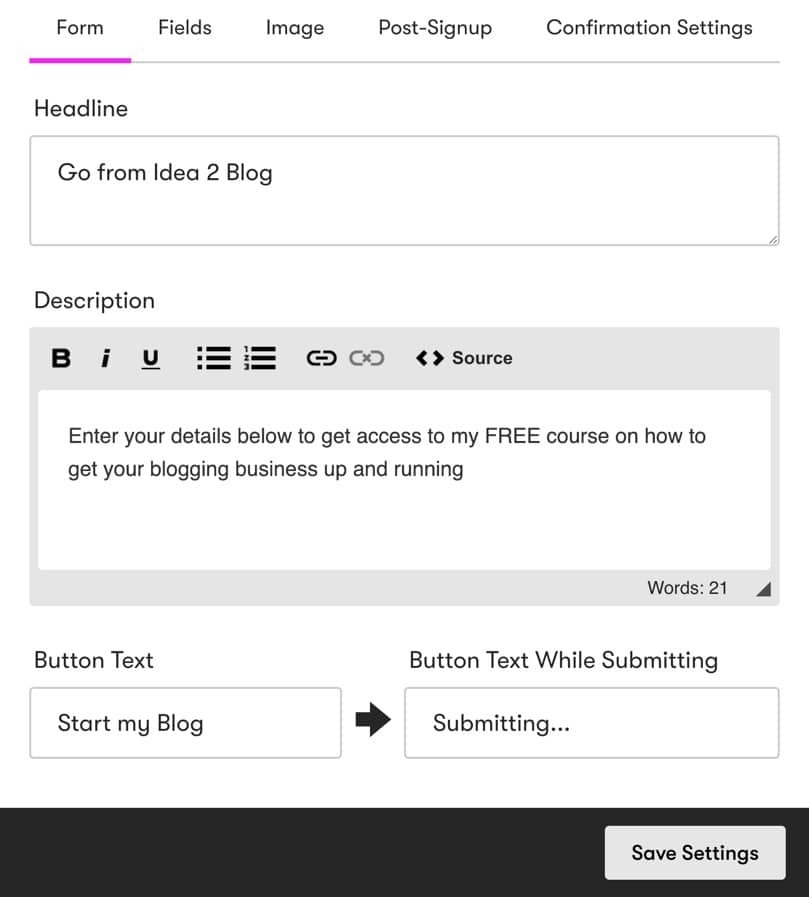
You now have the option to customize the content of the form.
Once you change that text, it updates the form.
You can also customize the button text.
I recommend clicking on the “save Settings” button before moving on.
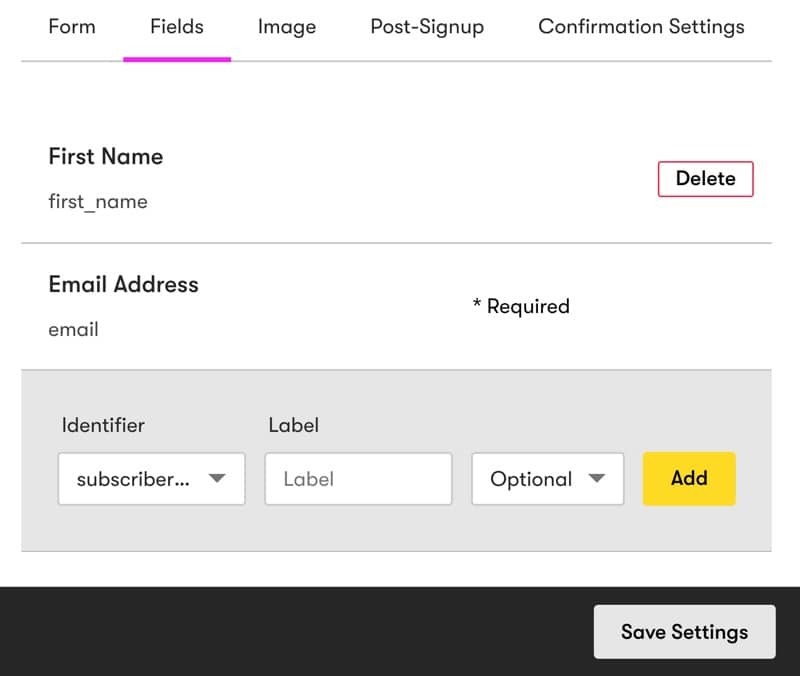
Then, go to the “Fields” tab and specify which custom fields you want included.
If you want to include first name, select that from the Drop down menu and then put First Name for the label.
Select whether it should be optional and then click on “Add”
If you want to change the order of the fields, click and drag it right to put them where you want them to be.
And of course, click Save settings before continuing.
If you have an image that goes along with your free resource, you can add that by clicking on the tabs section.
The next thing is to decide what to do post sign-up.
You have a few options here. You can simply have a sign-up message here that invites them to go and check their email to confirm it if you are doing double opt in.
Or you can change that message to suit your specific situation.
You can also just have it redirect them to a thank you page. This is usually my preference as I can control the look and feel of that page. If you want to do that, you can just add your confirmation page URL right here and select this to activate that redirect.
If you have a special setup where your confirmation page tracks details in a specific way, you can choose to Send subscriber data to that page.
If you have no idea what this means, then just don’t worry about it.
And lastly, if you want to track the event in Google Analytics, which is always good, you can select that option.
The next thing is to decide what to do post sign-up.
You have a few options here. You can simply have a sign-up message here that invites them to go and check their email to confirm it if you are doing double opt in.
Or you can change that message to suit your specific situation.
You can also just have it redirect them to a thank you page. This is usually my preference as I can control the look and feel of that page. If you want to do that, you can just add your confirmation page URL right here and select this to activate that redirect.
If you have a special setup where your confirmation page tracks details in a specific way, you can choose to Send subscriber data to that page.
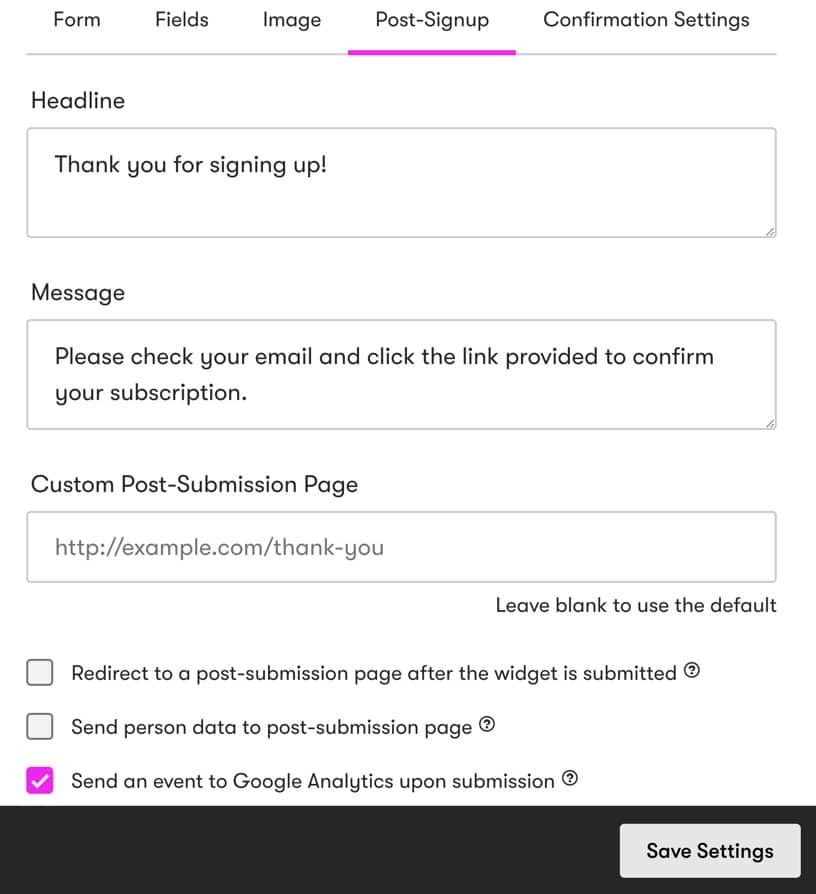

If you have no idea what this means, then just don’t worry about it.
And lastly, if you want to track the event in Google Analytics, which is always good, you can select that option.
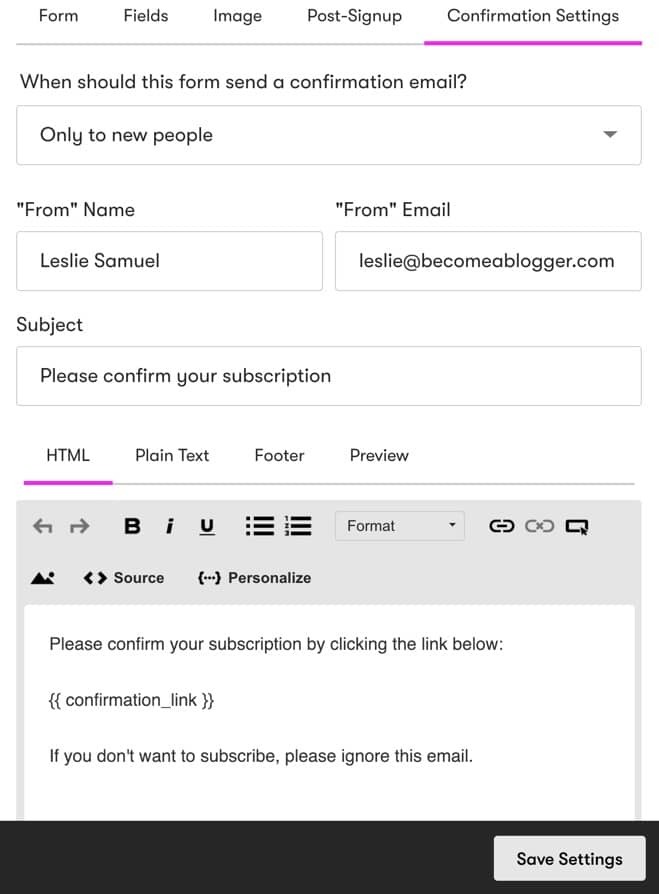
Next, go to the confirmation settings. This is where you specify if they should get a confirmation email for double opt-in. I highly recommend that you use double opt in, where they have to go to their inbox and click to confirm that they want your stuff.
This is the safest way to grow your email list because you’re getting the people who really want to subscribe. It will result in fewer subscribers, but they will be higher quality.
I generally Choose to send it only to new subscribers because if they are already subscribed to one of my other lists, they already double opted in.
Then you can customize your confirmation email to say what you want it to say.
It’s important to leave the code for the confirmation link.


Over to the right, you get to design of the form.
You have 3 different options for adding the form to your site. The first is using the widget, which when enabled will allow you to do some cool things.
Now if you’re using the widget, you have to have the Drip code set up on your site for tracking.
That will also make it possible for these forms to show up automatically on your site. If you’re using WordPress, see my tutorial on how to add drip tracking to WordPress.
There are some advanced features you can use to customize the subscriber’s experience.
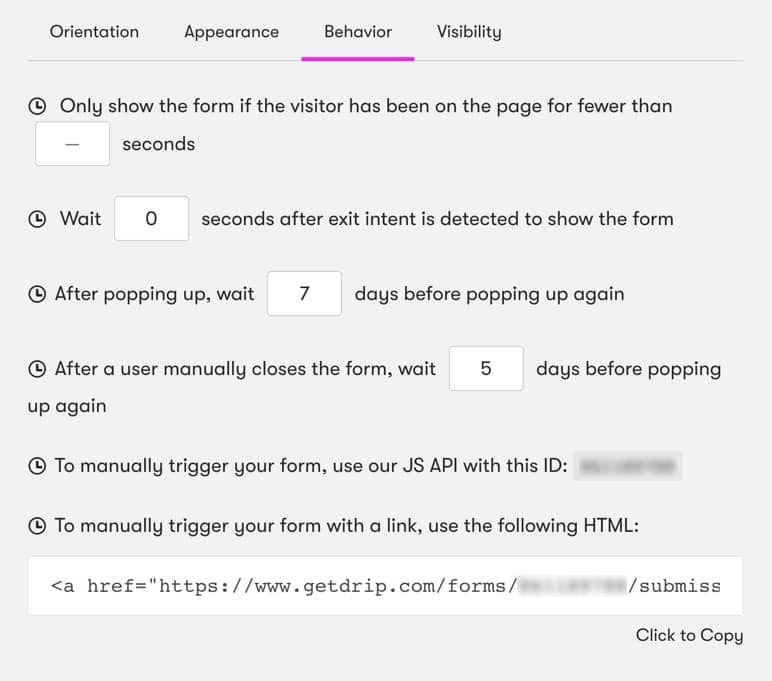
For example, you can set your form on a time delay, so that after a certain amount of time, the form will show up. Or you can make it exit intent, which is my absolute favorite.
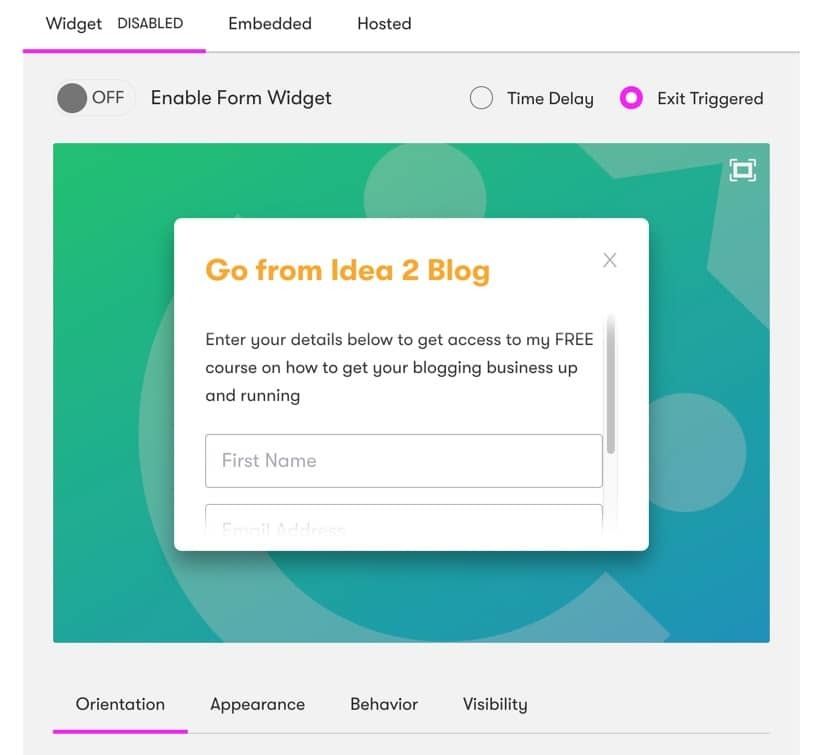

In that case, it will not show up until that visitor is leaving the site. Once the browser notices they are going to the address bar, the form will pop up.
That way, you aren’t annoying people while they are consuming your awesome content.
You can also customize where the form shows up.
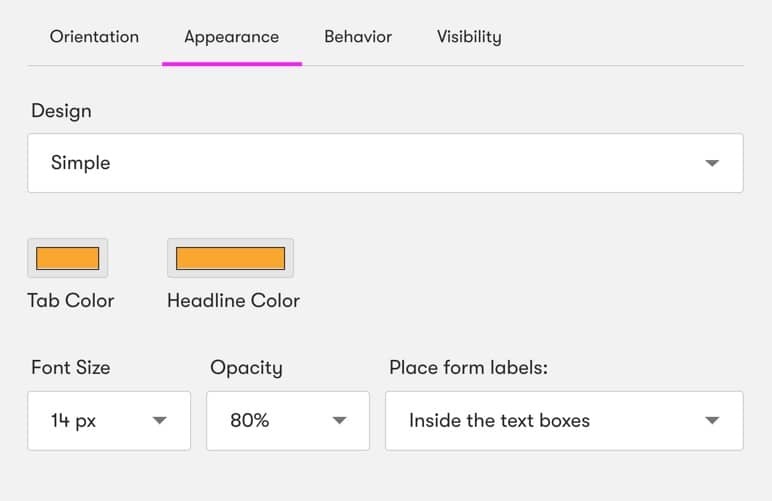
If you go to “Appearance” and change a few minor design elements like the colors, font size, opacity and where the labels appear.
Then you can also adjust the form’s behavior. So you can say for example, if you set it as a time delay, wait 10 seconds to pop up, or when someone scrolls to a certain percentage of the way down the page.
You can also say, once it pops up, don’t pop up again for that person until after a certain number of days. If you only want it to show once a week, then you’d put 7 here.
You can also set an amount of time after which it will show up after someone closes your forms.
There are also some manual trigger options that I’m not gonna get into in this tutorial.
If you selected exit triggered, the options are gonna be slightly different.
It’ll all be related to when they are leaving the page.
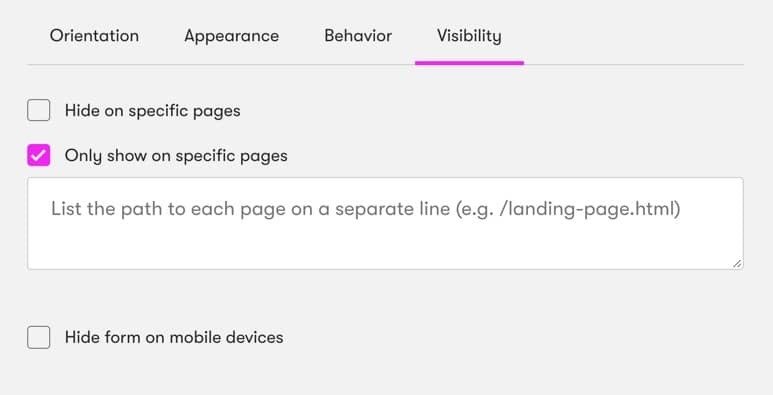
Lastly, if you go to Visibility, you’re able to determine which pages you want the form to show on.
If you want to hide it on specific pages, you can also specify that.
Or if you ONLY want it to show on specific pages, you can specify that.
One other thing to mention, if you want to use the widget, you have to toggle it on. Once you do that, it should show up on your site. It may take about 15 minutes or so, but it’ll be there once you have the Drip tracking code on your site.



Embedded Forms
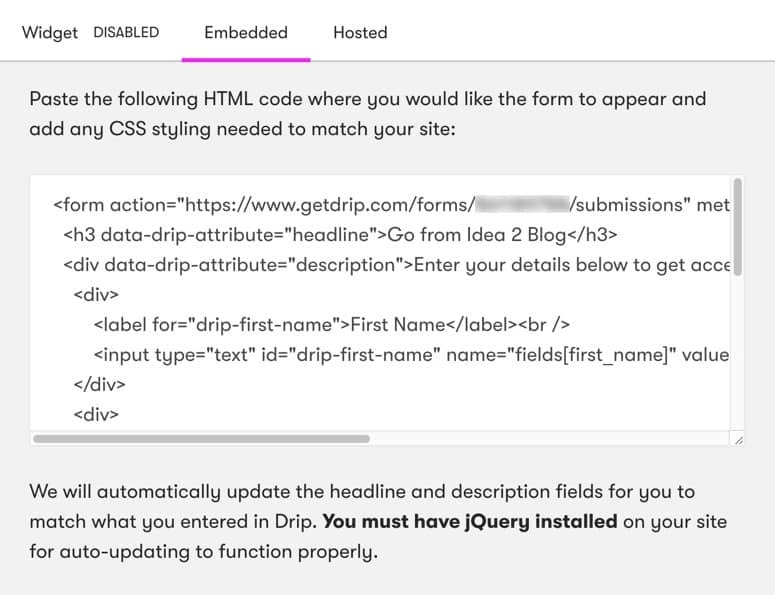
Instead of using the widget option, you can also use the embedded form. If you want to do that, you can copy that code and add it to the HTML of whatever page you want to add this to.
If you’re using WordPress, check out my tutorial on how to add forms to your site.
The last option is to use the hosted version of the form.
This is simple. It gives you a URL to use. However, this is NOT on your site. It’s on Drip’s site. But you can send people directly to this URL and they can fill out the form.

This is my least favorite option because I like to customize the user experience to match my branding. You just can’t do that on these pages. But it is an option, so I’m letting you know it’s there.
QUESTION: What are you using to add forms to your site? Go ahead and leave your answer to this question in the comments area below.

