Are you using Google Analytics to track your blog traffic?
If so, are you also using it to track conversions?
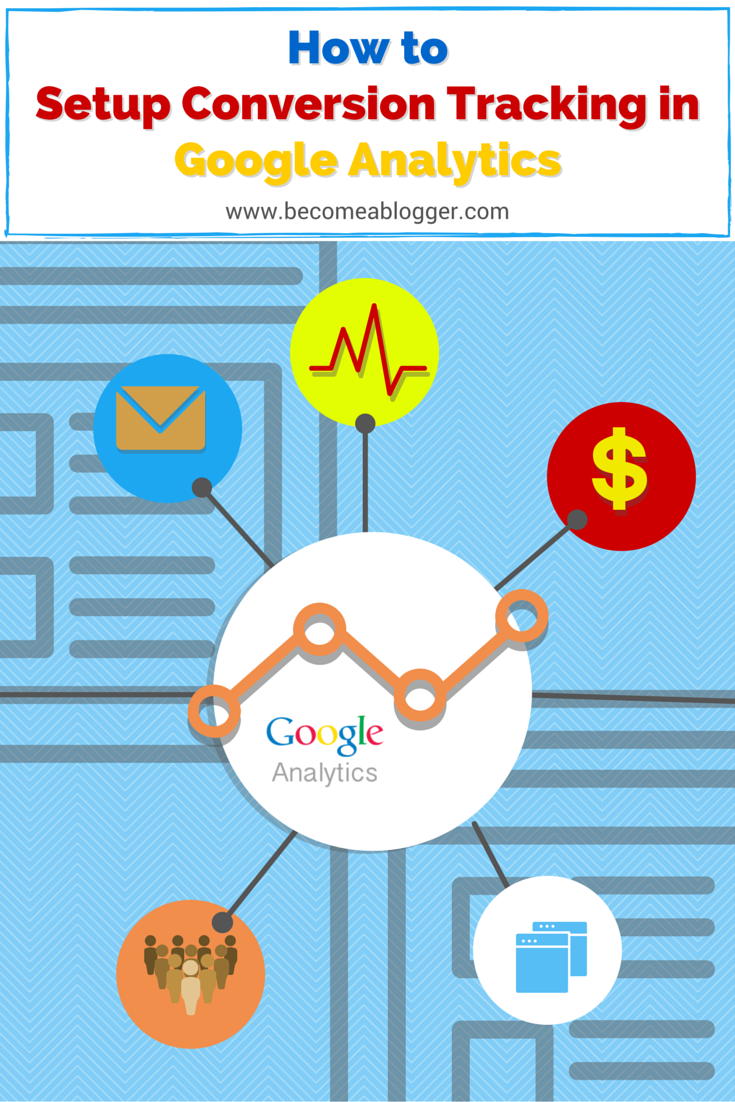
If not, this article is for you. I’m going to show you how to setup conversion tracking in Google analytics to track important events like email list signups and sales.
An Introduction to Conversion Tracking
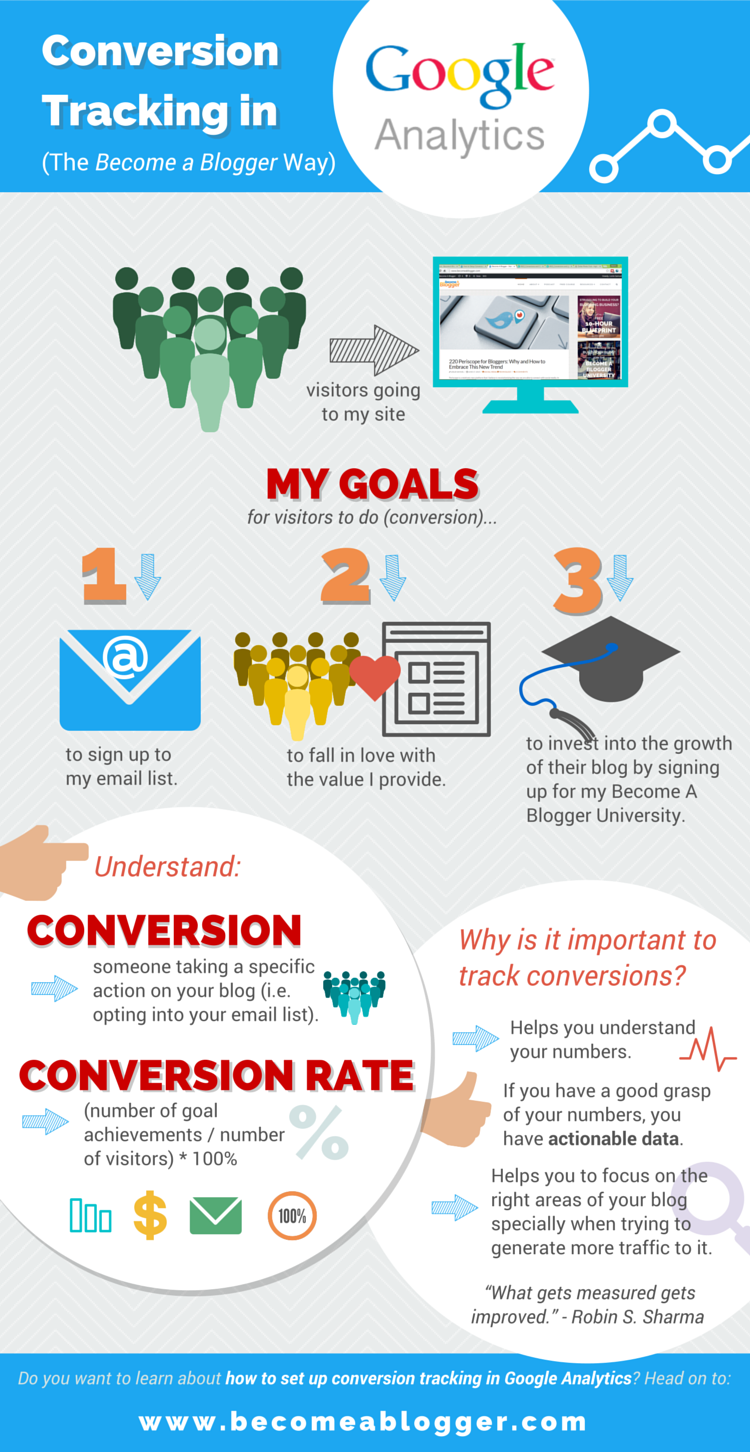
 When someone visits your blog, there are specific actions you want them to take. For me, my first goal is for people to sign up to my email list.
My second goal is for visitors to fall in love with me. Ok, not with me, but with the value I provide.
My third goal is for people to invest into the growth of their blog by signing up for my Become A Blogger University.
Your goals may differ, but there’s definitely one thing we have in common – we all have goals 🙂
As a blogger who’s blogging as a business, you need to familiarize yourself with some basic terms.
When I say conversion, I’m referring to someone taking a specific action on your blog (i.e. opting into your email list).
Your conversion rate is the percentage of people who take that action.
Conversion rate = number of goal achievements/number of visitors * 100%
For example, if 100 people visit a specific page on your site and 10 of those people sign up to your email list, your conversion rate for opt ins on that specific page is 10%.
Why it’s Important to Track Your Conversions
Tracking your conversions is important because as Robin S. Sharma puts it – “What gets measured gets improved.”
If you’re running a business, it’s important to understand your numbers. If you have a good grasp of your numbers, you have actionable data. Here are some specific examples of how data can help you build a smarter business.

Let’s say you just finished running a few different Social Media campaigns to generate traffic for your blog’s opt in page over the last month. You decided to test out campaigns on Facebook, Twitter and Pinterest.
Because you’re a savvy marketer, you have conversion tracking set up in Google Analytics and you can see your conversions for all three social networks.
For the sake of simplification, let’s say 1000 people visited your blog through each network. When you look at your conversions you see the following:
Facebook: 120 conversions
Twitter: 2 conversions
Pinterest: 15 conversions
Based on that data (and yes, these numbers are 100% made up), you know that for your business, it makes much more sense to focus on Facebook, because you will get more signups.
Let’s take another example.
Once again, you’re still the savvy, conversion-tracking marketer and you are able to see how many signups you’re getting from every piece of content you publish on your blog.
In this example, you’re a food blogger, and after a few months of tracking your conversions, you’re able to determine that whenever you post a recipe, you get twice as many signups as when you publish your behind-the-scenes content.
What would be your next logical decision? Post more recipes. Why? Because that’s when you get the best audience response.
How to Setup Conversion Tracking in Google Analytics
I’m going to assume that you already have Google Analytics installed on your blog and that it’s tracking your blog traffic without any issues.
To track your conversions, you only need to know one thing – your goal destination.
For example – If someone is signing up to your email list, they’re normally redirected to a thank you page. If you set it up correctly, the only way they’ll land on that page is if they sign up to your email list. That is your goal destination.
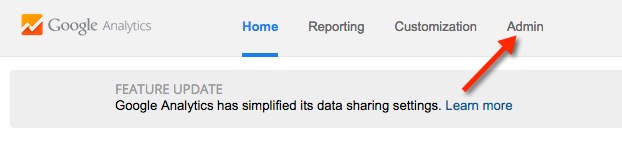
Once you’re ready to set up conversion tracking, log into Google Analytics and click on “Admin” at the top of the screen.
Make sure you have the correct property selected (for me, that would be Become A Blogger) and click on “Goals” in the third column of your screen.
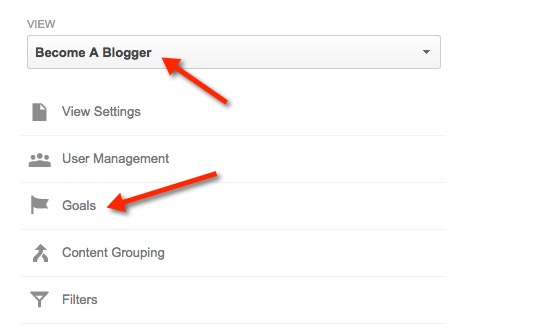
This will bring up a list of your current goals. If you’re setting this up for the first time, your Goals list will be empty.
Click on the “+NEW GOAL” button.

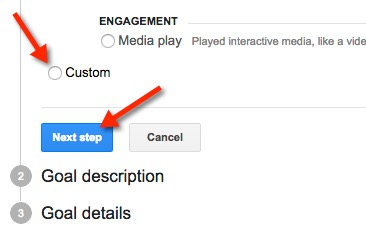
This will bring up a new screen where you can either select a specific template or create a custom goal. Select “Custom” and then click on the “Next step” button.
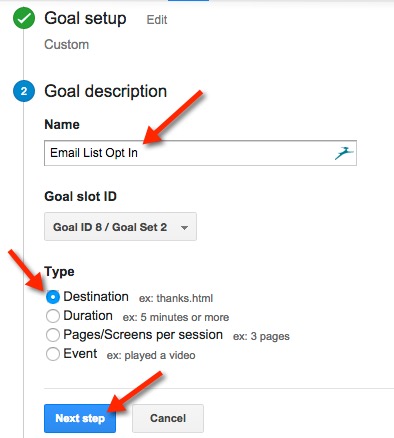
Give your goal a name, select “Destination” as the type and then click on the “Next step” button.
This is where you enter your goal details. Enter the destination URL. If you are doing a simple email opt in, this will be your the URL of your “thank you” page. However, you don’t need to include the entire URL. If your destination is www.example.com/thankyou/, simply enter /thankyou/
You also want to give it a specific value. This will help you compare your conversions in different ways (more on this later). For something like signing up to my email list, I give each conversion a value of $1.
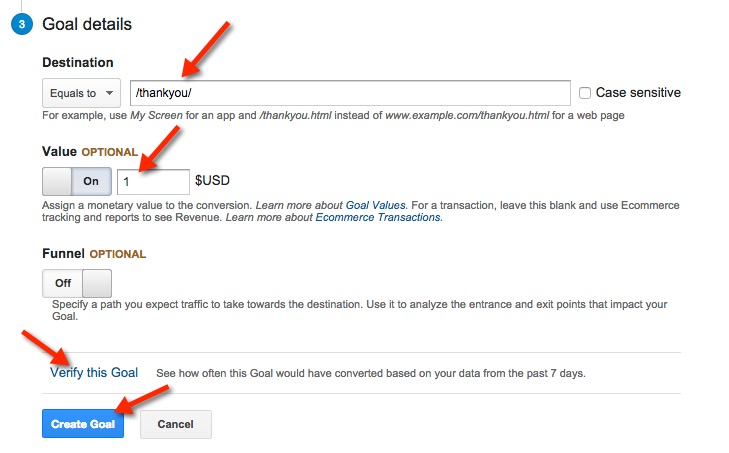
Once you’ve done that, click on “Verify this Goal” to make sure that you set it up correctly. Then click on “Create Goal.”
That’s it, you’ve successfully set up a goal and can start tracking your conversions.
More Advanced Tracking
There are some more complicated goal situations that require more advanced levels of tracking. For example, when someone signs up for my Become A Blogger University, they are making a purchase via my membership system and landing on a “thank you” page that’s dynamically generated.
The “thank you” page includes a /thanks.php(AndABunchOfOtherCode).
This isn’t just a simple page; it requires advanced setup. Instead of having my destination equal a specific URL, I selected “Regular Expression” as the destination type and set the destination as /amember/thanks.*
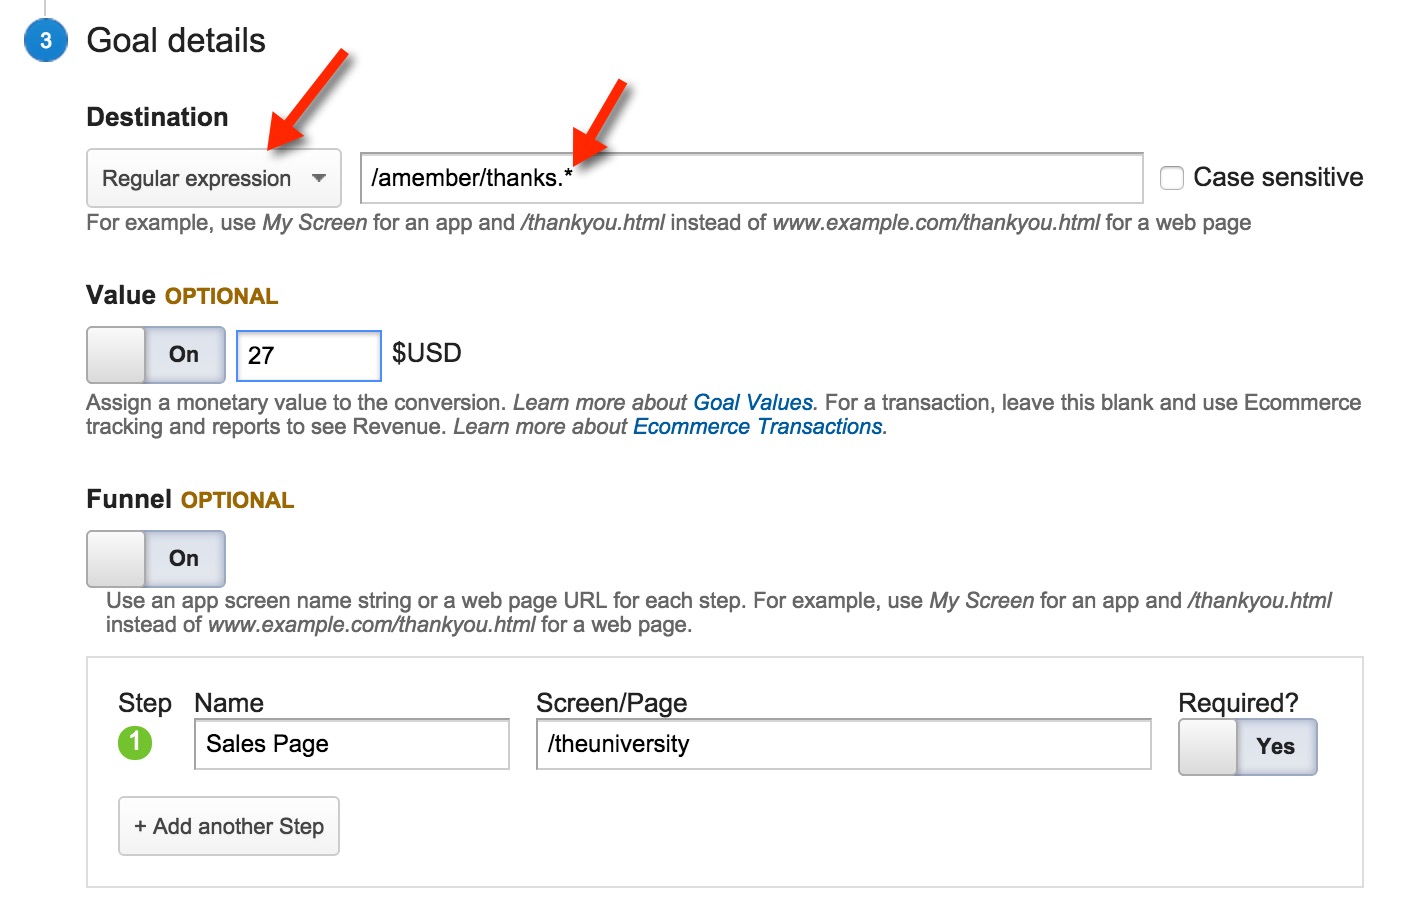
That “.*” indicates that I want it to register /thanks.ANYTHING.
For the destination type, you can also select “begins with” if you don’t want to add the entire URL and the first part is consistent.
Last, I decide to set up the funnel features for this goal as shown in the previous image.
This feature specifies that the goal should only register if the visitor reaches a specific page first.
In my situation, I ONLY want a conversion for a sale to register if the individual actually visits my sales page first. That way, if someone happens to stumble onto my thank you page but doesn’t actually go through the purchase process, it doesn’t get registered as a conversion.
Monitoring Conversions
There are many ways to monitor conversions. The simplest way is to go into your blog’s analytics, select “Conversions” and then “Overview in your sidebar.
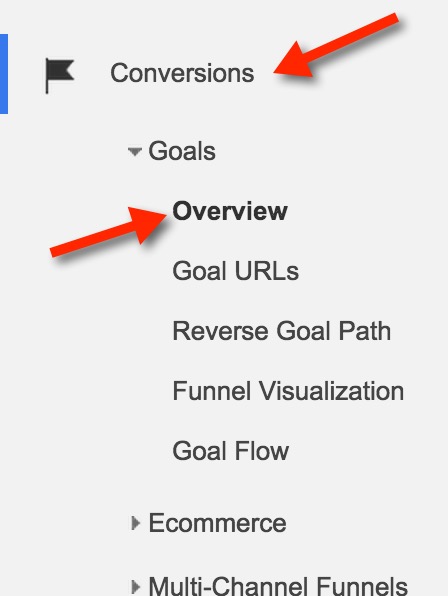
This will give you a good overview of how your blog is performing, how many signups you’ve gotten over a specified time period, and conversion rates.
However, the magic happens when you dig a little deeper.
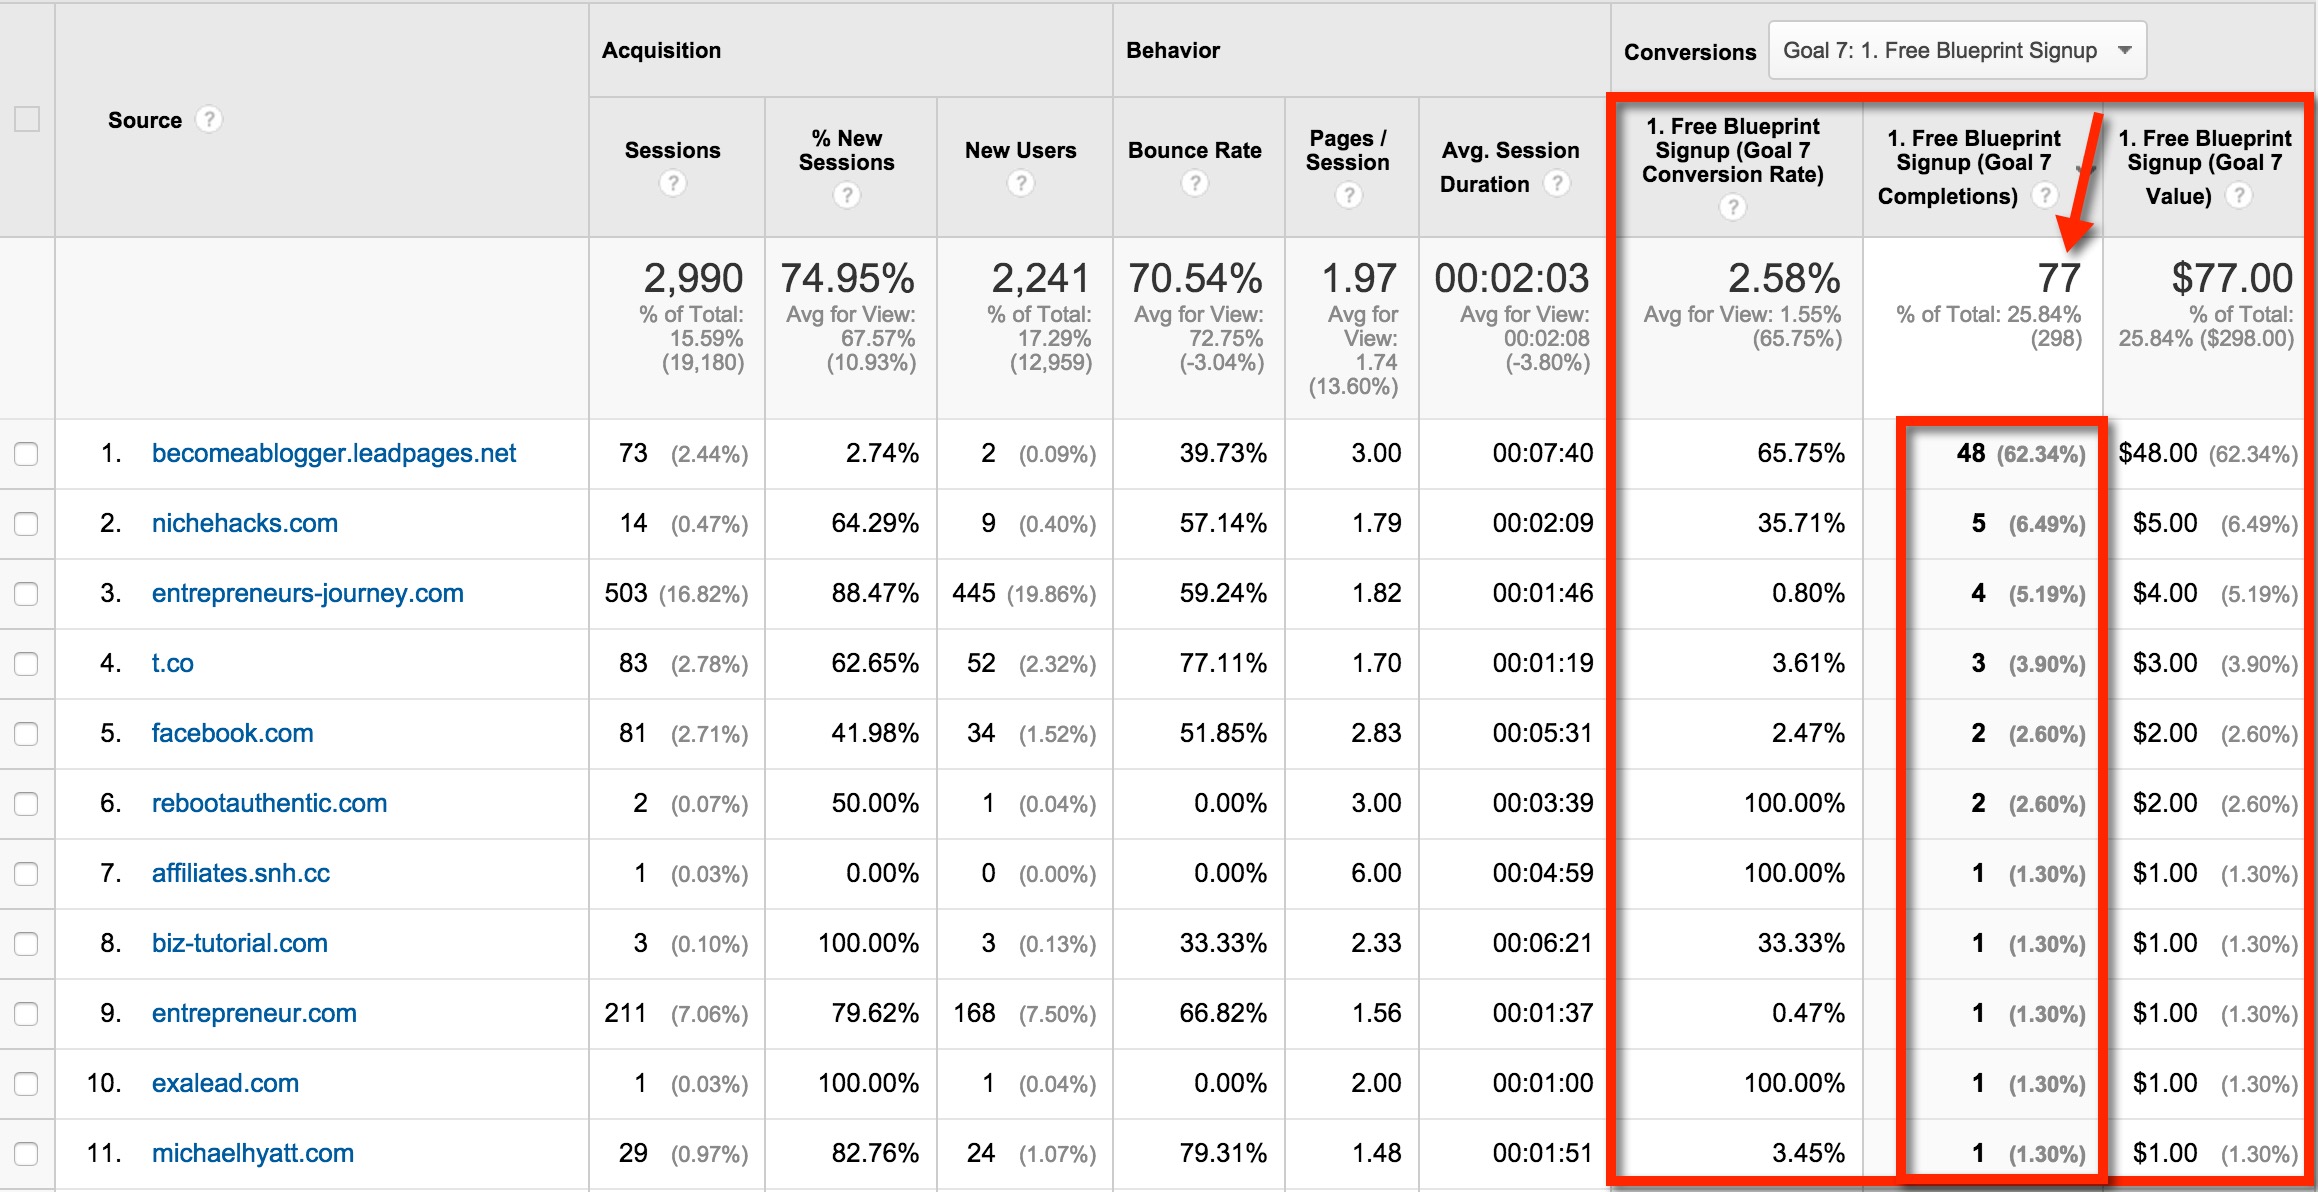
If you go to the “Acquisitions” section of your Analytics (also found in your sidebar), you are able to dig deep into any traffic sources and see how many signups result from each source.
For example, if I go to “Acquisitions” > “All Traffic” > “Referrals”. I’m able to see all of my referrals and the number of signups per traffic source.
If I go to “Behavior” > “Site Content” > “Landing Pages”, I can see how many conversions I get from each page or post on my blog over a specified time period.
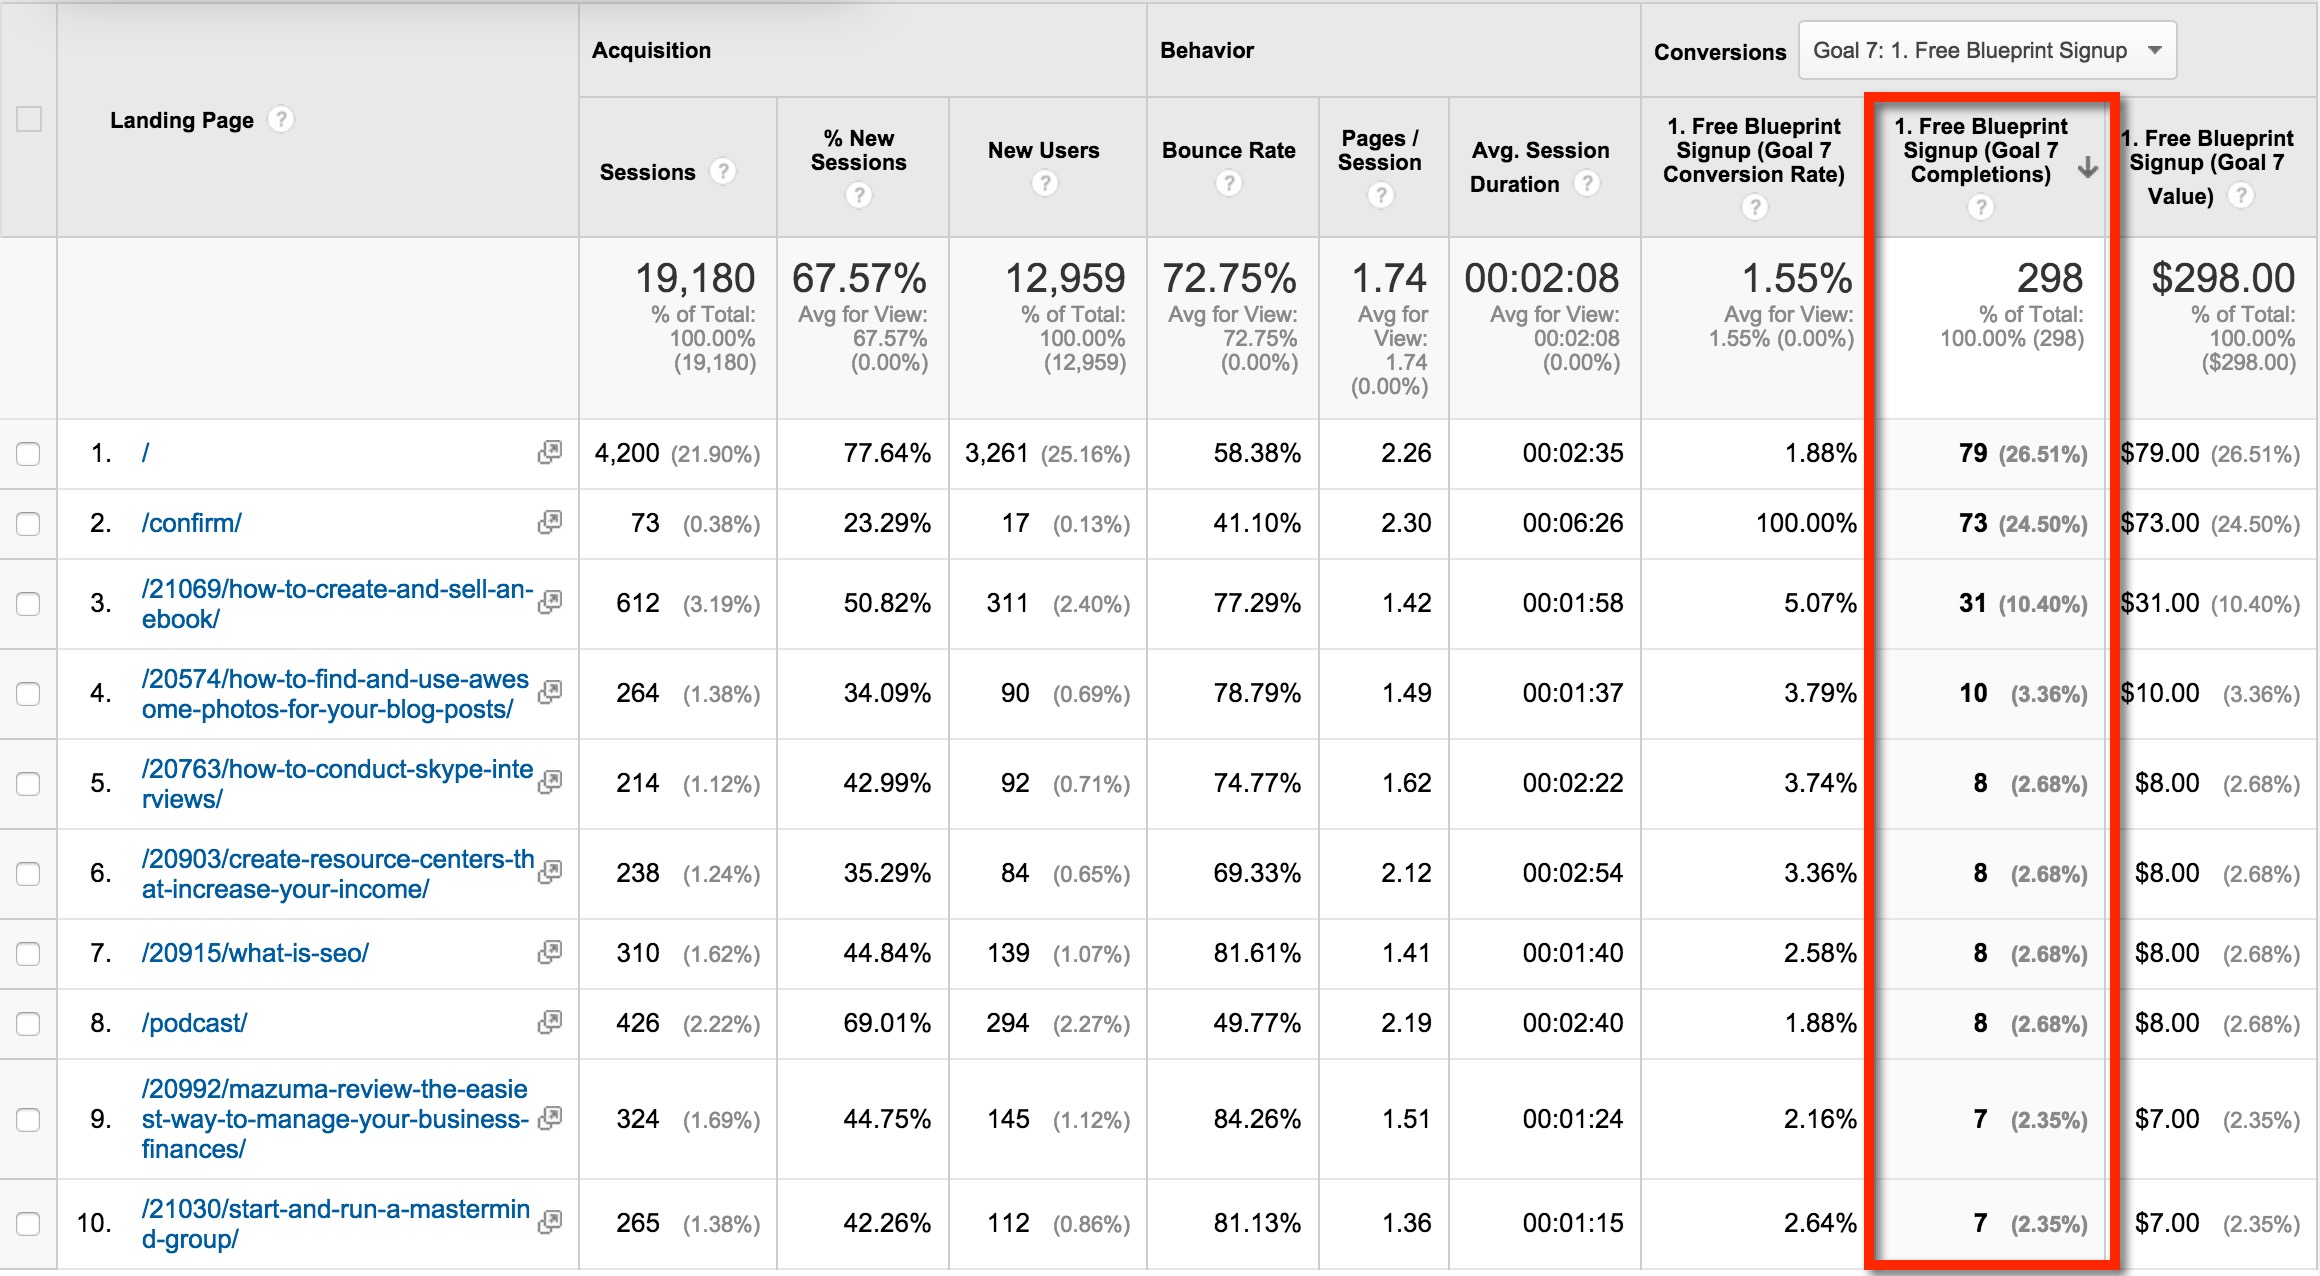
Now I have the data I need to make actionable decisions. The power is in my hand because I have data to show what does or doesn’t work.
Your action step

Now that you’ve seen how to set up goals and track conversions, I’m going to give you an assignment.
Setup your first goal!
That’s it. Stop reading, do it.
Actually, before you leave to take action, jump down to the comments and let me know what goal you’re going to setup.
Once you’re finished, come back and tell me that it’s done. Yep, I’m holding you accountable. That’s the way we grow together 🙂
Your Turn
Are you using goals and tracking conversions in Google Analytics, or is this all new to you? Let me know in the comments below.
Infographic